Printer Troubleshooting Guide: Fix Common Printer Problems
A printer that suddenly stops working can disrupt an entire working day. One moment it is printing normally; the next it appears offline, refuses to connect to Wi-Fi, leaves documents stuck in the print queue or produces faded and streaky pages.
The good news is that most common printer problems can be diagnosed at home without immediately replacing the printer or paying for a repair.
Printer Troubleshooting Guide
This complete UK printer troubleshooting guide will help you identify and fix problems affecting HP, Epson, Canon, Brother, Kyocera and other popular inkjet and laser printers. It covers Windows 11, Windows 10, macOS, iPhone, iPad, Wi-Fi networks, ink cartridges, printer drivers, paper feeding and print-quality problems.
Quick Answer: How Do I Troubleshoot a Printer?
To troubleshoot a printer, follow these steps in order:
- Check that the printer is switched on and displays no warning lights.
- Read and record any error message or error code.
- Confirm that paper is loaded correctly.
- Check the ink or toner levels.
- Restart the printer, computer and Wi-Fi router.
- Confirm the printer and device are connected to the same network.
- Clear documents stuck in the print queue.
- Make sure the correct printer is selected.
- Print a test page directly from the printer.
- Update or reinstall the correct printer driver.
- Run a nozzle check or cleaning cycle if print quality is poor.
- Contact the manufacturer or a qualified technician if the printer still cannot complete a self-test.
The most important part of printer troubleshooting is identifying whether the fault is in the printer, the connection, the computer or the document being printed. Testing these areas separately prevents unnecessary changes and makes the real cause easier to find.
Printer Troubleshooting at a Glance
Use this table to find the most likely starting point.
| Printer problem | Most likely cause | What to check first |
|---|---|---|
| Printer will not switch on | Power cable, socket or internal power fault | Test the wall socket and power cable |
| Printer appears offline | Lost connection or incorrect printer status | Restart devices and check the network |
| Printer is not found | Wi-Fi, USB, network discovery or driver problem | Confirm the connection and add the printer again |
| Document will not print | Wrong printer, paused queue or stuck job | Check the print queue and default printer |
| Printing is very slow | High-quality settings, network delay or large document | Print a simple one-page test |
| Blank pages | Empty ink, blocked nozzles or wrong cartridge installation | Check ink and print a nozzle test |
| Faded or streaky print | Low ink, blocked printhead or incorrect paper setting | Run a nozzle check or cleaning cycle |
| Paper jam | Misaligned, damp, curled or unsuitable paper | Switch off and remove paper carefully |
| Cartridge not recognised | Wrong cartridge, dirty chip, regional mismatch or firmware | Inspect the cartridge number and contacts |
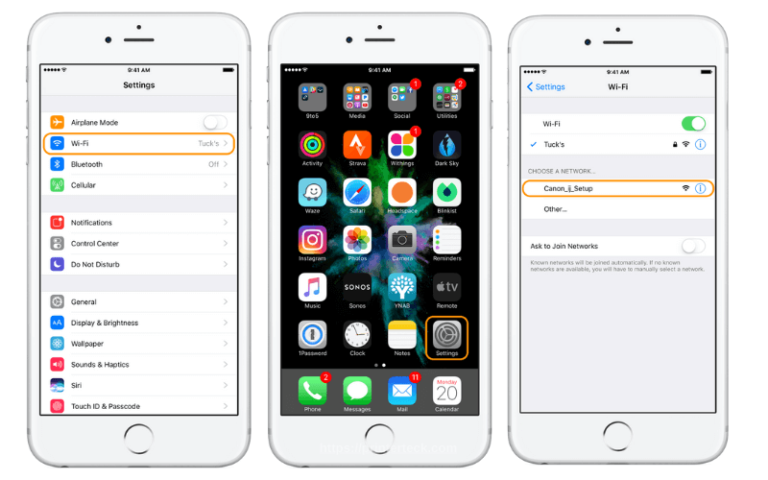
| AirPrint printer not found | Devices on different networks or AirPrint unavailable | Connect both devices to the same Wi-Fi |
| Random characters print | Driver, queue or communication problem | Clear the queue and reinstall the driver |
| Printer repeatedly disconnects | Weak Wi-Fi, changing IP address or router settings | Move the printer closer and restart the network |
Before You Start: Record What Has Changed
Before changing printer settings, think about when the problem began.
Ask yourself:
- Did the printer work earlier today?
- Was a Windows, macOS or printer firmware update installed?
- Have you changed the Wi-Fi router or network password?
- Was a new ink or toner cartridge recently installed?
- Is the problem affecting every document or only one file?
- Can other computers or phones print?
- Does the printer display an error code?
- Did the printer recently run out of paper or suffer a paper jam?
- Has the printer been moved?
- Is the problem affecting one colour or the entire print?
These details help separate a hardware problem from a connection, driver, cartridge or document problem.
Avoid performing every possible fix at once. Change one thing, test the printer and then move to the next step. This makes it easier to identify what solved the problem.
Step 1: Check the Printer’s Power and Control Panel
Start with the printer itself.
Make sure:
- The power cable is securely connected.
- The cable is plugged directly into a working wall socket.
- The printer’s display or power light is active.
- All access doors and paper trays are properly closed.
- No orange or red warning lights are flashing.
- The printer is not displaying a paper, ink, toner or maintenance message.
- The printer is not in sleep mode.
If the printer will not switch on, test the socket with another electrical device. If the printer uses a detachable power cable and you have an identical compatible cable, inspect or test it carefully.
Do not dismantle the printer or open its power supply. Internal printer components can retain electrical charge even after the printer has been unplugged.
How to Restart a Printer Properly
A full power restart can clear temporary errors.
- Leave the printer switched on.
- Disconnect the power cable from the rear.
- Unplug it from the wall socket.
- Wait approximately 60 seconds.
- Reconnect the cable directly to the wall.
- Reconnect it to the printer.
- Switch the printer on.
- Wait until it finishes starting before printing.
This does not remove printer firmware, saved network settings or installed drivers. It simply clears temporary operating states.
Step 2: Read the Error Message Before Clearing It
An error message often identifies the affected part of the printer.
Common messages include:
- Printer Offline
- Attention Required
- Paper Jam
- Out of Paper
- Cartridge Not Recognised
- Incompatible Cartridge
- Missing or Damaged Cartridge
- Printhead Problem
- Driver Unavailable
- Unable to Print
- No AirPrint Printers Found
- Printer in Error State
Photograph or write down the complete message and any numbers or letter combinations. The exact error is more useful than a general description such as “the printer is not working”.
A paper-feed warning requires a different process from an ink-system or network error. Clear the physical error first before changing Windows or Wi-Fi settings.
For help interpreting general messages, see our guide to why a printer error appears and how to fix it.
Step 3: Print a Test Page Without Using the Computer
A test page is one of the most useful printer diagnostic tools.
Many printers can print a status, network, configuration, nozzle-check or quality report directly from the control panel. The menu name varies by manufacturer, but look under:
Setup → Reports → Printer Status Report
or:
Settings → Maintenance → Nozzle Check
If the printer can produce its own test page, the basic printing hardware is operating. The problem is more likely to involve:
- The computer
- The mobile device
- The network connection
- The print queue
- The selected printer
- The driver
- The application or document
If the printer cannot complete a self-test, focus on the printer itself. Check the paper path, cartridges, toner, printhead and control-panel error.
Epson’s UK troubleshooting guidance similarly recommends performing a printer operation check before investigating the computer connection.
Printer Is Offline: How to Bring It Back Online
A printer may appear offline even though it is switched on. This normally means the computer cannot communicate with it.
Possible causes include:
- The printer has disconnected from Wi-Fi.
- The printer and computer are on different networks.
- The router has assigned the printer a different IP address.
- Windows has selected an old or duplicate printer.
- “Use Printer Offline” is enabled.
- A USB or Ethernet cable is loose.
- The print queue has stopped responding.
- The printer is asleep and does not wake correctly.
Quick Fix for a Printer Showing Offline
- Check that the printer is switched on.
- Restart the printer.
- Restart the computer or mobile device.
- Restart the Wi-Fi router if other network checks fail.
- Confirm that the printer is connected to the correct network.
- Open the printer queue and remove failed jobs.
- Make sure “Pause Printing” and “Use Printer Offline” are disabled.
- Set the working printer as the default.
- Print a test page.
- Remove and reinstall the printer only if the earlier checks fail.
Follow our dedicated guide to fix printer offline issues and get the printer online for more detailed Windows instructions.
There is also an older guide covering printer offline troubleshooting. These two posts overlap significantly and should eventually be consolidated into one stronger supporting article.
Printer Not Connecting to Wi-Fi
Wireless printer problems frequently begin after:
- Installing a new router
- Changing the broadband provider
- Changing the Wi-Fi name or password
- Moving the printer
- Switching between 2.4 GHz and 5 GHz networks
- Enabling a guest network
- Updating the router
- Allowing the printer to remain unused for a long period
How to Reconnect a Printer to Wi-Fi
- Confirm that Wi-Fi is enabled on the printer.
- Check the network name displayed by the printer.
- Make sure it matches the network used by your computer or phone.
- Move the printer closer to the router temporarily.
- Restart the printer and router.
- Run the printer’s wireless setup wizard.
- Enter the Wi-Fi password carefully.
- Print a network configuration report.
- Add the printer again on the computer if required.
- Print a simple test document.
Many home routers broadcast separate network names for different frequencies. Some older printers connect only to 2.4 GHz Wi-Fi. The computer can sometimes communicate across both frequencies, but router isolation or guest-network settings may prevent devices from seeing each other.
Avoid placing the printer beside:
- Thick concrete walls
- Metal cabinets
- Cordless phone bases
- Microwave ovens
- Large electrical appliances
- Other sources of wireless interference
For additional help, follow our guide to fixing printer Wi-Fi issues.
If the connection repeatedly drops on a Windows 11 computer, see how to fix a Wi-Fi printer that keeps disconnecting.
Printer Connected to Wi-Fi but Not Found
A wireless icon only confirms that the printer has joined a network. It does not prove that the computer can discover or communicate with it.
Check the printer’s IP address by printing a network report or opening its network settings. It will normally appear as four groups of numbers, such as:
192.168.1.120
If the printer’s address begins differently from the computer’s local network address, it may be connected to another router, extender or guest network.
Windows network discovery can also prevent a computer from finding a shared or network printer. Use our guide to fix network discovery issues in Windows 11.
If you use a Kyocera ECOSYS model, we also have a dedicated guide explaining how to connect the Kyocera ECOSYS P5026cdw to Wi-Fi.
Windows 11 Is Not Detecting the Printer
When Windows 11 cannot find a printer, first determine whether it uses USB, Wi-Fi or Ethernet.
For a USB Printer
- Disconnect and reconnect the USB cable.
- Try another USB port.
- Avoid an unpowered USB hub.
- Check the cable for damage.
- Restart the printer and computer.
- Look for the printer in Settings → Bluetooth & devices → Printers & scanners.
- Install the manufacturer’s correct driver.
For a Network Printer
- Confirm the printer and computer use the same network.
- Print the printer’s network report.
- Check whether the printer has a valid IP address.
- Restart the router and printer.
- Add the printer manually using its IP address if automatic discovery fails.
- Check firewall and network-discovery settings.
Read our complete guide when Windows 11 is not detecting a printer.
Fixing Printer Driver Problems
A printer driver allows Windows or macOS to communicate with the printer. A missing, outdated, damaged or incorrect driver can cause:
- Driver Unavailable
- Printer not detected
- Documents stuck in the queue
- Missing paper-size options
- Incorrect colours
- Garbled text
- Slow printing
- Failed two-sided printing
- Scanner functions not appearing
- Compatibility errors after an operating-system update
Download printer software from the manufacturer’s official support website. Select the exact model and correct operating-system version.
Avoid unknown “driver updater” websites. They may install the wrong software or bundle unwanted programs.
Update or Reinstall a Printer Driver
- Note the complete printer model.
- Remove failed documents from the print queue.
- Open Settings → Bluetooth & devices → Printers & scanners.
- Select the affected printer.
- Remove the printer if a clean installation is required.
- Restart the computer.
- Download the current driver from the manufacturer.
- Install it using the recommended connection method.
- Add the printer again.
- Print a Windows test page.
For a deeper diagnosis, see printer driver problems in Windows 11.
Older printers may require a different installation approach. Our guide explains how to fix printer compatibility issues in Windows 11.
Print Job Stuck in the Queue
A failed document can block every print job behind it. This may make the printer appear offline or unresponsive even when the hardware is working normally.
How to Clear a Printer Queue in Windows 11
- Open Settings.
- Select Bluetooth & devices.
- Choose Printers & scanners.
- Select the printer.
- Open the print queue.
- Cancel the failed document.
- Cancel the remaining jobs if necessary.
- Restart the printer.
- Try printing a simple one-page document.
If a document cannot be removed, restart the Windows Print Spooler.
How to Restart the Print Spooler
- Press Windows key + R.
- Enter
services.msc. - Select OK.
- Find Print Spooler.
- Right-click it.
- Select Restart.
- Reopen the print queue.
- Print a test page.
The spooler manages documents waiting to be printed. Restarting it clears a temporary service failure, but a queue that repeatedly becomes stuck may indicate a driver, application, network or document problem.
Use these detailed supporting guides:
- Print job stuck in the Windows 11 queue
- How to restart the Print Spooler in Windows 11
- Why the print queue is always full
Printer Is Printing Very Slowly
Slow printing does not always mean that the printer is faulty. The selected settings and document type can have a substantial effect on speed.
Common causes include:
- Best-quality or high-resolution mode
- Automatic two-sided printing
- Large photographs or graphics
- Slow Wi-Fi
- A busy home or office network
- Outdated drivers
- Print server delays
- Incorrect paper settings
- A large queue
- Low available memory
- Printing from a cloud-based application
- Quiet or silent mode
How to Diagnose Slow Printing
Print a one-page document containing only plain black text.
If that prints quickly, the printer is probably working correctly. The delay is likely caused by the original document, application or print setting.
Next, try:
- Change print quality from Best to Standard.
- Select the correct paper type.
- Turn off two-sided printing for the test.
- Print using USB or Ethernet if available.
- Clear other documents from the queue.
- Restart the printer and computer.
- Update the official driver.
- Test from another application.
- Reduce the file’s image resolution if appropriate.
- Check whether quiet mode is enabled.
PrinterTeck currently has several articles covering this subject:
- Five causes of slow printing in Windows 11
- Step-by-step fixes for slow printing
- Solutions for slow printing in Windows 11
- Ten solutions for slow printing in Windows 11 and 10
These posts target almost identical search intent. I recommend selecting the strongest-performing URL as the main slow-printing article, combining the best information from the others and redirecting weaker duplicates.
Fixing Poor Print Quality
Poor print quality may appear as:
- Faded text
- Missing colours
- Horizontal lines
- Vertical streaks
- Blurry images
- Smudged ink
- Incorrect colours
- Grainy photographs
- Blank pages
- Repeated marks
- Uneven toner coverage
The correct solution depends on whether the printer uses ink or toner.
Inkjet Print-Quality Troubleshooting
- Confirm that the correct paper type is selected.
- Check the ink levels.
- Print a nozzle-check pattern.
- Run one normal printhead-cleaning cycle if needed.
- Print another nozzle check.
- Align the printhead.
- Check whether the cartridges are correctly installed.
- Replace an empty or defective cartridge.
- Test with fresh, dry paper.
Do not run repeated deep-cleaning cycles without checking the results. Cleaning consumes ink, and multiple cycles can fill the printer’s maintenance system.
Laser Printer Quality Troubleshooting
- Remove and gently inspect the toner cartridge.
- Check for damaged or leaking toner.
- Confirm that sealing tape has been removed.
- Check the printer’s paper-type setting.
- Print an internal quality page.
- Inspect the drum if it is user-replaceable.
- Look for repeating marks at consistent intervals.
- Replace the affected consumable when required.
Do not touch a photoconductor drum surface. Oils and scratches can permanently affect print quality.
Read our detailed guide to resolving common printer print-quality issues.
Printer Producing Blank Pages
Blank pages can be caused by:
- Empty cartridges
- Blocked inkjet nozzles
- Protective tape left on a new cartridge
- An unrecognised cartridge
- Incorrect page size
- A damaged document
- Driver failure
- A missing colour required by the printer
- A printhead or ink-delivery fault
First, print an internal test page.
If the internal page is also blank, focus on the cartridges, ink delivery and printhead. If the internal page prints correctly but a computer document is blank, test another file and application before changing the printer hardware.
For inkjet printers, print a nozzle pattern before running a cleaning cycle. A nozzle check provides evidence of whether ink is reaching the paper.
Ink or Toner Cartridge Not Recognised
A cartridge error does not automatically mean that the cartridge is empty or that printer firmware is responsible.
Possible causes include:
- Incorrect cartridge number
- Cartridge intended for another region
- Protective tape still attached
- Dirty electronic contact
- Damaged cartridge chip
- Cartridge not fully inserted
- Incorrect colour position
- Defective cartridge
- Printer firmware change
- HP Instant Ink or cartridge-enrolment restrictions
- Damaged printer contacts
How to Troubleshoot an Unrecognised Cartridge
- Record the exact error message.
- Check the cartridge number against the printer model.
- Remove the affected cartridge.
- Confirm that all protective packaging has been removed.
- Inspect the contact or chip for damage.
- Gently clean the contact with a dry, lint-free cloth.
- Reinstall the cartridge in the correct colour position.
- Restart the printer.
- Test another suitable cartridge if available.
- Contact the cartridge supplier if the error remains.
Cartridge numbers can vary by region. A cartridge used in a similar printer sold outside the UK may not be suitable for the UK version.
For broader advice, read why a printer does not recognise ink.
HP users can follow these specialised guides:
- Troubleshooting HP incompatible, missing and cartridge failure errors
- How to resolve an HP cartridge error
- HP 953XL and 903XL firmware downgrade troubleshooting
Only attempt a firmware downgrade when a verified package exists for the exact printer model and regional variant. Installing incorrect firmware can make a printer unusable.
Paper Jam Troubleshooting
When a printer reports a paper jam:
- Cancel the print job.
- Switch off and unplug the printer.
- Remove loose paper from the input and output trays.
- Open the access areas shown in the printer manual.
- Pull jammed paper slowly in the normal direction of travel.
- Remove all scraps of torn paper.
- Check the rollers for labels, debris or foreign objects.
- Reload fresh, correctly aligned paper.
- Close every access door.
- Reconnect the printer and print a test page.
Do not use sharp tools inside the printer. They can damage rollers, sensors, belts and cables.
If paper jams repeatedly, inspect:
- Paper size and weight
- Bent or damp sheets
- Overfilled trays
- Incorrect paper guides
- Labels separating from their backing
- Worn pickup rollers
- Small pieces of paper inside the feed path
- Incorrect tray settings
AirPrint Printer Not Found on iPhone or iPad
Apple AirPrint normally works without installing a separate printer driver, but the printer must support AirPrint and be available on the same network.
Apple’s current guidance says the printer and Apple device should be connected to the same Wi-Fi network.
Fix “No AirPrint Printers Found”
- Confirm that the printer supports AirPrint.
- Switch on the printer and allow it to finish starting.
- Connect the printer to Wi-Fi.
- Connect the iPhone or iPad to the same network.
- Avoid a guest network that isolates connected devices.
- Restart the printer and Apple device.
- Restart the router if discovery still fails.
- Check for manufacturer-approved updates.
- Try printing from another AirPrint-compatible application.
- Test from another Apple device if available.
Follow our focused guides:
Troubleshooting Ink-Tank Printers
Ink-tank printers can have some different problems from cartridge-based inkjets.
Common issues include:
- Blocked nozzles after long periods without printing
- Air entering the ink lines
- Incorrectly filled tanks
- Wrong ink added to a tank
- Ink levels not reset correctly
- Printhead alignment problems
- Ink spills around the tank area
- Maintenance-box warnings
Always use the correct ink bottle for the exact printer model. Never mix inks based only on colour or bottle shape.
Print a nozzle test before cleaning the printhead. If ink lines appear empty or contain large air gaps, consult the model’s manual rather than repeatedly running cleaning cycles.
See our guide to common ink-tank printer problems and solutions.
For an Epson L3110, use our dedicated Epson L3110 troubleshooting guide.
Is the Problem the Printer, Computer or Document?
Use this simple isolation test.
If the Printer Cannot Print Its Own Test Page
The likely cause is:
- Paper or feed problem
- Cartridge or toner problem
- Printhead fault
- Internal hardware fault
- Printer error requiring service
If the Internal Test Page Prints but Windows Cannot Print
The likely cause is:
- Driver
- Queue
- Spooler
- Windows setting
- USB or network connection
- Incorrect printer selection
If Windows Prints but One Application Does Not
The likely cause is:
- Corrupt document
- Application setting
- Incorrect page size
- Font or graphics problem
- Application update or compatibility issue
If Other Devices Print but One Computer Does Not
The printer and network are probably working. Focus on that computer’s driver, queue, firewall and printer configuration.
If Nobody Can Print
Focus on the printer, router, shared network or print server.
This process is more reliable than reinstalling everything immediately.
When Should You Stop Troubleshooting?
Stop and seek professional help if:
- The printer smells of burning.
- Liquid has entered the printer.
- The power cable or plug is damaged.
- The printer repeatedly trips an electrical circuit.
- You hear grinding or cracking sounds.
- An internal belt, cable or gear is damaged.
- Toner has spilled inside a laser printer.
- The printer cannot complete a built-in self-test.
- A paper jam cannot be reached safely.
- Firmware installation failed and the printer will not start.
- Repair requires opening electrical or high-temperature components.
Laser printers contain components that become very hot. Allow the printer to cool before opening a jam-access area marked with a heat warning.
If you are uncertain whether repair is worthwhile, see our guide to troubleshooting and repairing a broken printer.
Is It Better to Repair or Replace a Printer?
Repair may be worthwhile when:
- The printer is relatively new.
- It meets your current printing needs.
- It uses economical ink or toner.
- The fault is limited to a replaceable part.
- The printer is under warranty.
- Repair costs considerably less than replacement.
- You already own spare consumables for it.
Replacement may be more sensible when:
- The printer has repeated hardware failures.
- A major printhead, formatter or power component has failed.
- Replacement parts are unavailable.
- The operating system no longer supports the printer.
- Running costs are unusually high.
- Repair approaches the cost of a suitable replacement.
- The printer no longer meets your volume or feature requirements.
Compare the complete cost, including new ink or toner. A low-priced printer supplied with starter cartridges may cost more than expected once full replacements are purchased.
How to Prevent Common Printer Problems
Regular attention can prevent many faults.
- Print at least occasionally if you use an inkjet.
- Keep paper sealed in a dry place.
- Use paper within the printer’s supported specifications.
- Do not overfill the input tray.
- Keep the printer away from heat, moisture and direct sunlight.
- Install software from official manufacturer websites.
- Review firmware information before updating.
- Keep spare ink and toner sealed until required.
- Avoid touching cartridge chips and drum surfaces.
- Remove failed jobs from the queue.
- Leave enough ventilation around a laser printer.
- Record the Wi-Fi details and printer IP address.
- Check warranty terms before dismantling or modifying the printer.
- Use a surge-protected electrical supply where appropriate.
For a broader overview, read common printer problems and how to solve them.
Frequently Asked Questions
Why is my printer connected but not printing?
The print queue may be paused, a document may be stuck, the wrong printer may be selected or the driver may have failed. Clear the queue, set the correct printer as default and print a test page.
Why does my printer say offline when it is switched on?
“Offline” normally means the computer cannot communicate with the printer. Check the USB, Ethernet or Wi-Fi connection and confirm that the computer has selected the current printer rather than an old duplicate installation.
What is the first thing I should check when a printer stops working?
Check the control panel for an error message. Then confirm power, paper, ink or toner and the connection. Record the error before restarting the printer.
How do I reset my printer?
Start with a power restart: disconnect the power cable for about 60 seconds and then reconnect it. A factory reset is different and may remove network settings and preferences. Use it only when the manufacturer’s instructions recommend it.
Why is my wireless printer not connecting?
The printer may have an old Wi-Fi password, weak signal or connection to a different network. Run its wireless setup again and make sure the printer and computer use the same network.
Why is Windows 11 not finding my printer?
Possible causes include disabled network discovery, an outdated driver, a changed printer IP address or an unreliable USB connection. Restart the devices, check the connection and install the official Windows 11 driver.
How do I clear a print job that will not delete?
Restart the Windows Print Spooler service. Open services.msc, find Print Spooler and select Restart. Then reopen the print queue and remove the failed job.
Why is my printer printing blank pages when it has ink?
The nozzles may be blocked, the cartridge may not be recognised or protective tape may still be attached. Print an internal nozzle check and inspect the cartridges before running a cleaning cycle.
Why are printed pages faded or streaky?
Inkjet printers may have blocked nozzles or low ink. Laser printers may have low toner, a worn drum or contamination. Print the printer’s quality report to identify whether the pattern affects one colour or the entire page.
Can turning the printer off fix an error?
A proper power restart can clear temporary communication or control errors. It will not repair damaged hardware, remove installed firmware or make an incorrect cartridge compatible.
Should I update my printer driver?
Update the driver when the printer is not detected, loses features, produces driver errors or stops working after an operating-system update. Download the driver from the printer manufacturer’s official website.
Can a firmware update stop compatible cartridges working?
Some firmware updates can change cartridge-chip recognition. However, cartridge errors can also be caused by dirty contacts, incorrect numbers, regional incompatibility or a defective cartridge. Diagnose these possibilities before considering firmware changes.
Why does my printer keep disconnecting from Wi-Fi?
The signal may be weak, the router may be changing the printer’s IP address or the printer may be switching into a deep sleep state. Move it closer, restart the network and consider reserving a consistent IP address in the router.
How many printhead-cleaning cycles should I run?
Start with one normal cleaning cycle and print another nozzle check. Avoid repeatedly running deep cleaning because it consumes significant ink and may not repair a physically damaged printhead.
Is it safe to remove jammed paper myself?
Yes, when the jam is accessible through the normal user-access areas. Switch off and unplug the printer first. Do not use sharp tools or dismantle covers not intended for users.
How do I know whether my printer needs repairing?
If the printer cannot complete its own internal test after paper, ink, toner and accessible jams have been checked, it may need professional service. Grinding noises, electrical smells and visible internal damage also require expert attention.
Final Printer Troubleshooting Checklist
Before arranging a repair or replacing the printer, confirm that you have:
- Recorded the complete error message
- Restarted the printer correctly
- Checked the paper and consumables
- Printed an internal test page
- Tested another document
- Checked the selected printer
- Cleared the print queue
- Restarted the Print Spooler
- Confirmed the USB or network connection
- Checked that devices use the same Wi-Fi
- Installed the correct official driver
- Run a nozzle or quality test
- Checked the printer’s warranty and support page
Working through these checks in order should resolve many everyday printer problems and, just as importantly, identify when the fault genuinely requires a repair.